
Knowing how to install and remove bike pedals is an essential skill for any aspiring home mechanic. It’s easy to do — you simply thread the pedals into or out of the crank arms. But there are a few things that are easy to get wrong. Follow these simple steps, and you’ll definitely get it right.
[button]Shop Pedals[/button]
Step 1: Get the correct tool to install and remove your bike pedals
 You need the correct tool to install or remove your specific pedals. Inspect your pedals to determine which tool you need. It will usually be one of three options:
- Pedal wrench / 15mm wrench
- 8mm hex wrench
- 6mm hex wrench
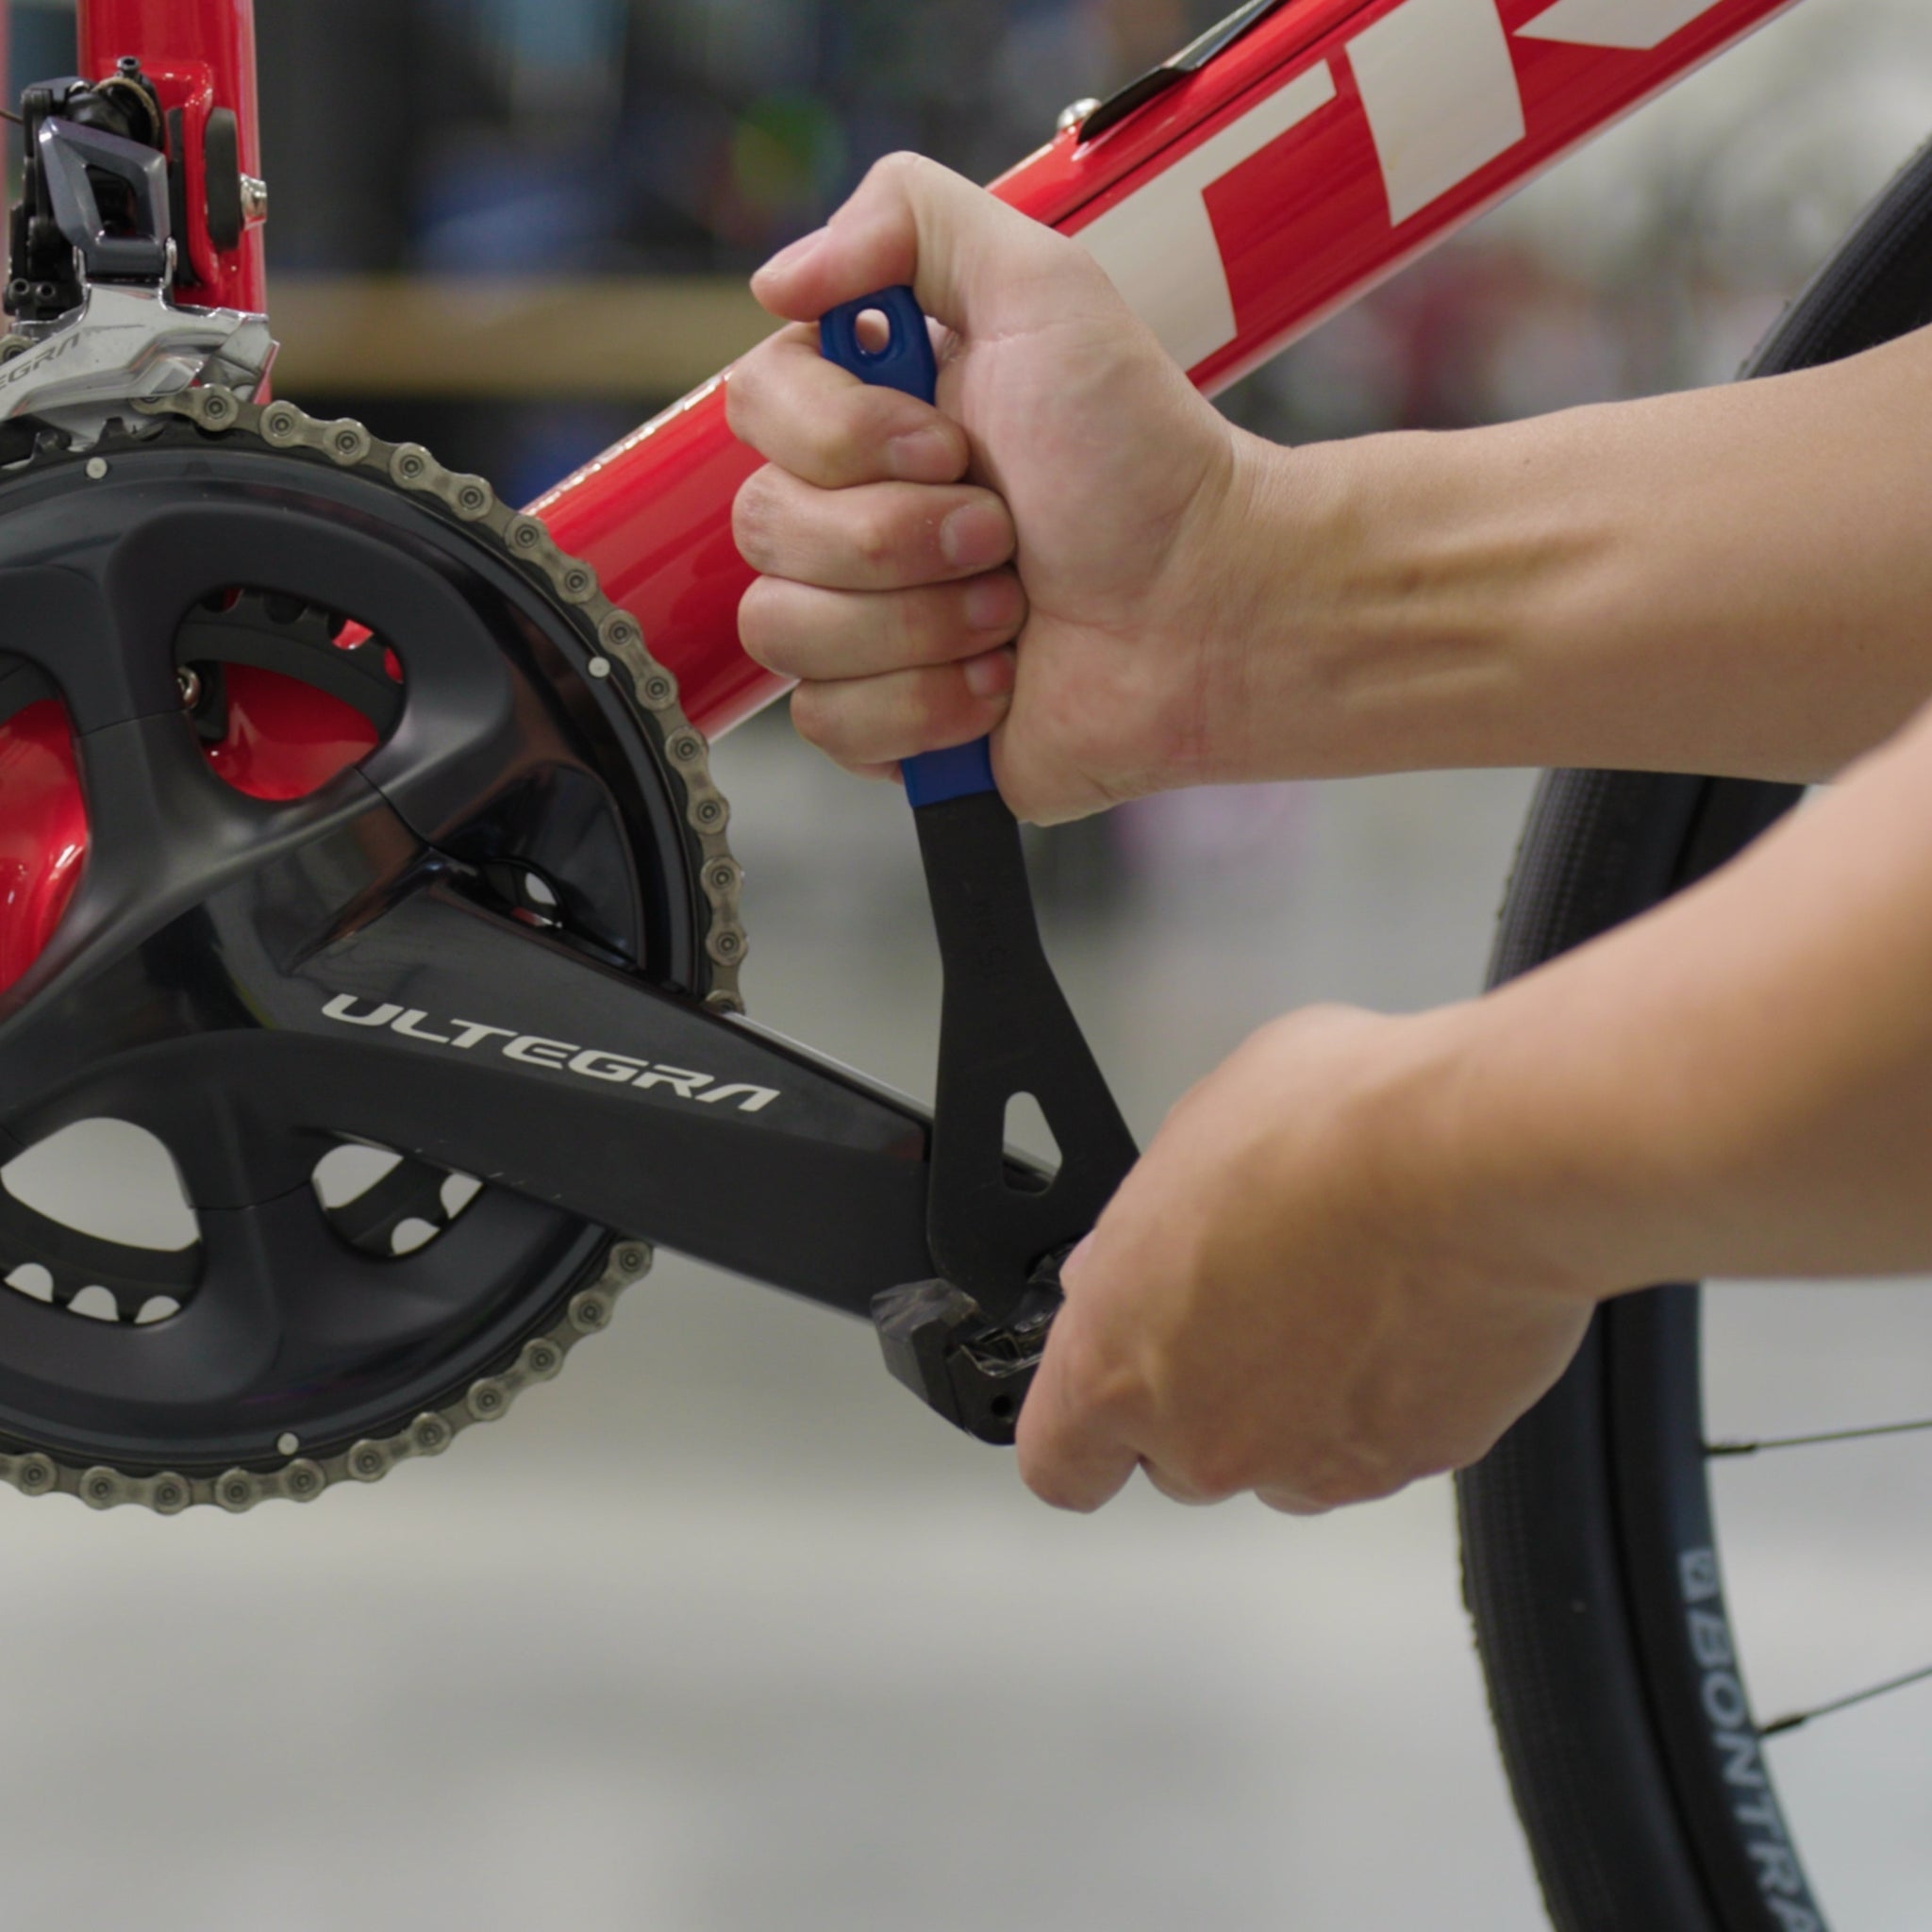
Vintage and budget pedals usually require a 15mm pedal wrench that will fit onto the flat sections machined into the pedal spindle. Pedal wrenches are narrow, so they easily fit between the pedal and crank arm. A pedal-specific wrench is ideal, but it isn’t always necessary. A 15mm box wrench or small adjustable crescent wrench will do the same job, provided it is narrow enough to fit.
Note: If you're using a 15mm cone wrench like I am here, be cautious! This tool is extremely thin and could round-out your pedals' wrench flats. A dedicated pedal wrench is always preferable.
[product-block handle="park-tool-pw-5-home-mechanic-15-0mm-pedal-wrench"/]
Most modern clipless and flat pedals will require a standard hex wrench, either an 8 mm or 6mm wrench, that will fit into the end of the pedal spindle.
[product-block handle="park-tool-ph-1-2-p-handle-hex-set-with-holder-1"/]
[button]Shop Tools[/button]
Step 2: Identify the pedal thread direction


- Right / drive side pedal: Standard thread — spin clockwise to tighten
- Left / non-drive side pedal: Reverse thread — spin counterclockwise to tighten
A lot of people get hung up when installing or removing their pedals because the right pedal uses the standard thread direction (righty-tighty) while the left pedal is reverse threaded (lefty-tighty). The left pedal is reverse threaded to prevent the pedal from loosening itself while pedaling.
Here’s an easy way to remember which way to thread your pedals:

- To install: Spin the TOP of the pedal spindle toward the FRONT of the bike.
- To remove: Spin the TOP of the pedal spindle toward the REAR of the bike.
It’s usually obvious which pedal is the right and which is left, but if you’re unsure, most pedals will have an “R” and “L” stamped on the pedal spindle. If not, you can identify which side a pedal should be installed on by looking closely at the pedal threads to determine which direction they spin to tighten.
[newsletter]
Step 2.5: Grease the pedal threads before installing
 No one likes wrestling with a stuck pedal. Before installing your pedals, you should always grease the threads on the pedal spindle. Grease prevents corrosion, so the pedals will be easier to remove later. If you’re installing used pedals, give the threads a quick wipe and clean before greasing. You don’t need to use a lot of grease. A small dab spread thinly on the threads is enough
You don’t need to use bike-specific grease, but a small tube is affordable, and it can last for years. If you want to use a non-bike-specific grease, most hardware and auto parts stores will carry waterproof grease or anti-seize. In a pinch, Vaseline will work, or you can install your pedals dry, but be sure to add real grease as soon as possible.
Step 3: Tighten your bike pedals
Bike pedals don’t need to be torqued down excessively as the spinning motion of the cranks will actually keep the pedals tight as you ride. The typical recommended torque for pedals is about 360 inch-pounds or just over 40.5 Newton meters.
Many mechanics, however, don’t tighten pedals this much or even use a torque wrench. The common method is to install the pedals until the spindle contacts the crank arm and then give it a single firm “oomph” with a pedal wrench or hex wrench to tighten it. This will be enough to keep the pedal from loosening, but not so much that the pedal becomes difficult to remove in the future.
Important Tip: Avoid cross-threading bike pedals
Cross-threading happens when the pedal threads do not engage correctly with the threads in the crank arm. If you cross-thread your pedals, it will damage the threads in your crank arm and your pedal can fall out while you’re riding.
To avoid cross-threading pedals, make sure you install the pedals into the crank arm as straight as possible. Pedals should always thread in easily, and you shouldn’t feel any resistance while tightening. If you do feel resistance, it’s best to stop, remove the pedal, and try again. Try cleaning and regreasing the threads on the pedal spindle and in the crank arm.
[button]Shop Pedals[/button]